Rudolph Rings in the Season
I saw these cute little reindeer ornaments at a recent craft show and knew immediately that my Brownie troop would LOVE to make the lil' critters!
The project is easy enough for a six-year-old (with the possibility of a bit of antler assistance). My troop is made up of eight-year-olds, so I know they'll be able to dive right in!
Supplies:
Mini terracotta pots
brown acrylic paint
brown pipe cleaners
jingle bells (small enough to fit inside the pots)
wiggly eyes
red pom poms (nose)
festive ribbon (for hanger)
craft glue (or glue gun for older crafters)

Step 1: First I wiped off the pot with a damp towel to remove any manufacturing residue, and then gave it a light coat of brown paint.
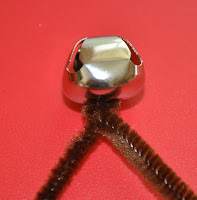
 Step 2: Loop a pipe cleaner through the bell, to the halfway mark of the pipe cleaner, and twist a couple of times.
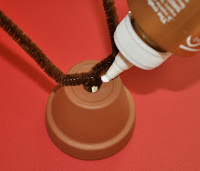
Step 3: Thread both ends of the p.c. upward through the hole in the bottom of the pot.


Step 4: Make small, outward bends in the p.c. to keep it from slipping back through the hole. I found that a dab of glue on each side helped to keep the p.c. from "flopping over". Antlers that stand up are so much cuter!


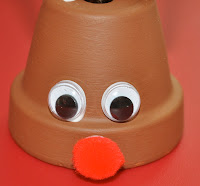
Steps 5 & 6: Glue on the eyes and nose.
 Step 7: Bend the antlers into little points (luckily, perfection isn't
required).
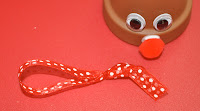
 Step 8: Fold a small length of ribbon in half, knot the ends together, and thread the loop upward through the pot hole.
Once the glue is dried, Rudolph is ready to hang.
I admit that I couldn't resist after this project was "finished"...and I drew little lashes on with a Sharpie. Definitely an improvement.
I hope that you have the chance to try this with the kids in your life...or just make a few for yourself.


No comments:
Post a Comment