Saturday, March 31, 2012

adding some color to my t-shirts


Buy White T-shirts. Wash and dry without Fabric softner in the rinse water and don't use dryer sheets.
I bought mine at Wal-mart, if I recall there were 7 shirts in the pack. (3x)
 
In the Crafts Department, near the Tulip paint, are packages of spray on tye dye in a sprints bottle. Basic colors of Blue, Red, Green and Yellow. Although the price of around $10 seems a bit high, this goes a long way.
 
 
Because I was doing shirts  I hung them out on the canopy frame. This is not something I would want to do inside. Be sure you are upwind as well, or your clothes you are wearing will have some added color as well.
 
stand about 2 foot away and spray onto the shirts. if you half pump the top, you get spots and sploches. if you do the full pump you get more of a mist..
 
 Allow to dry a couple of hours, Don't wash for 3 days. so the colors set. wash inside out.
 
You can use one or all the colors or in any combo you desire. On one I used just red and blue. on the other one, I used all the colors, The yellow didn't show up all that bright but it's there.

Billie C.
http://thelifeofbilliec.blogspot.com/


I know I got a lot of exercise the last few years,......
just getting over the hill.


Thursday, March 29, 2012

first 5 Recipes in my email


1
Glazed Carrots
One 1 pound bag baby carrots
3 Tablespoons unsalted butter
1/4 cup water
1/4 cup maple syrup
2 Tablespoons orange juice
1/2 teaspoon ground cinnamon
1/4 teaspoon ground allspice
1/4 teaspoon salt
Place all the ingredients in a medium, heavy saucepan.
Bring to a boil over medium-high heat, stirring occasionally, until the carrots are tender and the sauce becomes a shiny glaze, about 15 minutes.
Using an oven mitt or pot holder, remove from the heat and serve.
 
Here is the recipe that I use for our catering. It is a BIG deal at each of our parties.
First, I do make thing ahead all of the time. I make them and then place them into a crock pot. I do these a lot of times with the holidays especially. I make potatoes the day before, and then heat them back up in the micro and place in a warm crock pot. I have about a dozen crock pots in all sizes just for this little trick.
Hugz, Debbie Hoggan
 
 
************
 
2
Portabellas & Tomatoes on Angel Hair Pasta

2 portabella mushrooms, chopped
1 can diced tomatoes, drained
cooked angel hair pasta (enough for two)
vegan soy parmesan cheese
olive oil
balsamic vinegar
garlic powder
onion powder
dried basil
Directions:
Saute mushrooms in olive oil on medium heat until soft. Add tomatoes, garlic & onion powders, dried basil and splash of balsamic vinegar. Saute for another 5 minutes, then add tomatoes. Saute for another 10 minutes or until flavors mingle. Serve on angel hair pasta and sprinkle with soy parm.

Preparation time: 5-10 minutes
 
***************
 
3
Bisquick Taco Casserole

1 c. Bisquick
1 can refried beans
1/4 c. water
1 lb. ground beef
1 med. onion
1 jar thick taco sauce
2 c. grated Cheddar
Lettuce, shredded
Tomatoes, diced
Sour cream

Mix Bisquick, refried beans and water. Pat into bottom of large baking dish. Brown ground beef and add chopped onion. Drain. Spread on top of crust tin baking dish. Then layer taco sauce and 1 cup cheese. Bake at 350 degrees until done (when you can lift the side up and it doesn't not stick or fall apart.) Let cool a little and then top with shredded lettuce, diced tomatoes, grated cheese and sour cream.
 
********
 
4
MOLTEN LAVA CAKES Makes 8 cakes.

1/4 tsp almond extract
6 large eggs + 6 egg yolks
1 cup flour
Pinch of nutmeg
1/2 tsp cinnamon
2 sticks unsalted butter
1 1/2 tsp vanilla
2 1/2 cups powdered sugar
12 oz semisweet chocolate, chopped
Pinch of cayenne pepper
4 tsp sugar

Heat oven to 400°. Butter eight 6 oz ramekins and sprinkle each with 1/2 tsp sugar. Combine butter, cinnamon, cayenne, nutmeg and chocolate in a saucepan until melted and smooth. Cool slightly. Whisk flour, powdered sugar, eggs and yolks, vanilla and almond extract in a bowl until creamy. Whisk in melted chocolate mixture. Divide among ramekins. Bake cakes until tops are stiff and edges darken 14 min. Remove from oven and let cool 5 min. Loosen edges of cakes and transfer to plates while warm. Dust with powdered sugar, then SERVE...
 
*********
 
5
 
EASTER EGG TREATS Serving size 1 egg.

Canned frosting or decorating gel, optional
6 cups Rice Krispies cereal
3 tbs butter
1/2 cup of M&M's chocolate candies
4 cups miniature marshmallows
12 plastic snap apart 3x2" Easter eggs

Coat inside of plastic eggs with cooking spray. Set aside. In a pan, melt butter. Add marshmallows and stir until completely melted. Remove from heat. Add cereal. Stir until well coated. Firmly press 1/4 cup of cereal mixture into each plastic egg half. Make hollow centers in each half. Remove from molds. Place on wax paper. Cool slightly. Place 6 candies in one half of each egg, press the two halves together until they stick. Cool completely. Decorate as desired with frosting and candies, then SERVE...


Billie C.
http://thelifeofbilliec.blogspot.com/


I know I got a lot of exercise the last few years,......
just getting over the hill.


Tuesday, March 27, 2012

March 27

Tupelo Love sleeping on Jerry's bed.
Just as Macon loves sleeping on my bed

When we go out anywhere, the kennels are full

At least they all get along together well. Sometimes the larger dog is with the black dog and the yellow dog is in with the cats to change things up a bit.

*******************

I made Corbin a Birthday Card

Jerry is wearing one of his new T-shirts. I would never have matched it with the green, but it looks great on him, don't you think?

I made a mess....

and turned it into this....

I find plain white boring.. So, so boring.. so I got some color on my clothes

Yep, even some under-wears .. hard to find undie that I like, that are comfortable, and have some color to it. I made a matching set !!

So, now I'm cleaning the camper in spurts and bursts of energy. I just fnished the bathroom, next is the closet area and then the beds.

Tomorrow will be laundry.


Billie C.
http://thelifeofbilliec.blogspot.com/


I know I got a lot of exercise the last few years,......
just getting over the hill.


Thursday, March 22, 2012

links in my craft letter for today


Good Morning !!

 
Good Morning !!

What a wonderful day to wake up to. Every day is a wonderful day to wake up, don't you think?

Anyway. I got Jerry set off to work with a good breakfast and took the dogs out. Read a few emails but got sleep quickly so went back to bed. I asked Jerry to set the alarm to go off at 7:30 and he did. so I was up by the time it went off.  Got my breakfast of oatmeal with dried fruit in me, took my meds, took the dogs out, then weed eated around the camper.

Momma D mowed yesterday, and I asked her to leave around my camper cause I can do it with the weed eater. It took more than I expected but I got it done by 8:45. I've gotten my shower and folded up one tub of clothes with two more still to go. I got done just in time since it's trying to rain now. I love the smell of fresh mowed grass. I had to wipe all the grass crud off the weedeater before I could put it inside. When Jerry gets home, I can put it in the van until I need it again. My clothes I had on now need washed, they are covered in "green". I'm surprised the cats are not back there, stripping all the grass clippings out of them.

Mike was taken to the hospital in an ambluance yesterday. I didn't see it, but Laruen told me about it. She was surprised I didn't  see the ambluance. I think I was napping at the time. I really don't look out and see what all is going on outside. Too many years living in a "city" I guess. Jerry said he saw him when he came home so he didn't stay over. Jerry said he was walking very slow. Mike has a limp to begin  with, Falling out the door a couple of weeks ago I'm sure didn't help. Someone tossed a hide a bed out that he and Robert had to pick up and put in the back of his truck, the un-load it at the trash station. I'm sure all of that plus what ever it was he went to pick up didn't do his back any good at all. I did offer to help Momma D with the trash, when she was picking it up yesterday, She said she didn't need any help with it.

Outside my door ... As I said, it looks like rain. We need the rain.  Did I mention that I put out some flowers?  I have them in cut off kitty litter jugs and they need some water. I would much rather nature provide that. Momma D liked how I have them outside the front of the camper (it gets the sun all day long) And wanted to know what the containers were. I told her, I Think Mike may have picked a few of them up from where they blew out from under the camper cause I can't find them now. That's ok cause I buy at least one a week. Reminds me. I bought some flower seeds and need to sprinkle a few seeds in the jugs, as well. I know I'm going to look for some moss rose while we are out this next weekend. I love the stuff
 
The Dogs ...  Well Macon, while we were at the edge of the hill that leads down the lake, "found" one of the stray cats around here and wanted to give chase.  Oops. I have the other end of the lead, it took a while to convience him that we were not there to cat chase but to potty. Finally he got that done and we came back to the camper.  He's the only one not in a kennel right now. Rocky refused to come out when I put Barney in one because I wanted to weedeat. They got in a fight, so now they both can just stay in there for a while and get over it.
 
The Cats ... Were running window to window, watching me weedeat. They still sit at the door meowing to be let out. Isn't going to happen on purpose.  If they are not at the door, they are at Jerry's window, trying to push it open. Then end up turning on the radio by standing on it.
 
From the kitchen...  Jerry said we could eat out at Bubba's tonight if he works all day. He might get rained out but don't count on it.
 
I am hearing... Rain on the roof, Rachael Ray on the T.V., the cat at the door.
 
I am wearing...  Jean shorts and a faded top. I want comfort and not fashion today.


Wednesday, March 21, 2012

quick update

 
Hello.
I spent a little time with my Cricut this afternoon.  I didn't save anything because I was checking out how to do a few things.
 
I checked out making a card with an Envelope. I was using copy paper from the printer as a test run.  Yes, I like it. I have to set down and plan Corbin's BD Card and get it in the mail. I will work on it tonight, after dinner. I'll have to find something to print inside just for him.
 
I have different cartages to check out I got one with animals I wanted to use for his card but now I'm thinking of going a different direction.

Links to the crafts posted in Teri's Crafts newsletter


Monday, March 19, 2012

Teri's Crafts Newsletter for March 19, 2012

 
*****
Glass bottles
Tape-Covered Spring Vase

    Give a used glass bottle a second life as a pretty Easter vase. Cover the bottle with thick strips of colored tape (available at crafts

*******
button hair clips 1
Button Hairclips

    Button, button, who's got the button? Your little girl will be a style star this Easter when you make these hairclips with pretty buttons. Open the clips before attaching fabric or stacked buttons with hot glue; allow to dry overnight.


********
 
 
Colorful metal containers
Creative Easter Tins

    Transform a metal container into an Easter basket or a spot to store your Easter candies. Look for brightly colored metal tins and add magnets (you also can create your own magnets by attaching magnetic strips to printed letters or designs). Top with pretty paper flowers and file-drawer labels.


*******
 
 
bunny bucket

Rascally Rabbit Gift Box

Make an Easter gift box that's sure to be just as great as the present inside!
What You Need:
This simple project will
delight your child and
help spread Easter cheer.

  • Oval box with lid (7-1/2 x 10 x 5 inches)
  • 12 x 18-inch sheet of pink stiff felt
  • Stapler
  • Crafts glue
  • Double-sided tape (optional)
  • 5 sheets of blue paper
  • White, black, purple, and yellow paper scraps
  • Thin white wire
  • 1-1/2-inch pink pom-pom
  • 2-1/2-inch white pom-pom
  • White crafts fur scraps
  • Hole punch
  • Orange curly ribbon
Instructions:

1. Cut two 4 x 18-inch ears from felt. Staple ears inside the box along top edge.

2. Cover box and lid with blue paper.

3. Have an adult cut a 1/8 x 4-1/2-inch slit on each side of the lid and slip over ears.

4. Cut out face pieces and glue to front of box. Add wire whiskers, a pink pom-pom nose, and white pom-pom tail. Glue a small piece of fur to top of lid.

5. Punch two holes at the top of each ear. Thread one curly ribbon through each ear. Knot ends together to create a handle.


*******


Charming Chicks Sock Puppets

Made from baby socks turned inside out, this chirping set of baby chicks right is perfectly sized for little fingers.
charming chick puppets
What you need
  • Socks
  • Scissors
  • Black beads
  • Orange felt
  • Feather-boa tufts
  • Orange pipe cleaners
  • Instructions:

    1. Cut the cuffs off the socks, cut wings from the cuffs, and sew two wings onto the sides of each puppet. The birds have black-bead eyes, orange felt beaks, and feather-boa tufts of hair.

    2. For legs, poke orange pipe cleaners through the socks and bend to hold in place.

    ********

    Spring Floral Wall Bucket

    Finished floral wall bucket on the wall.Welcome spring with a floral wall bucket for your wall or door. Flowers can be easily arranged if you begin with the largest flowers and end with the smaller ones. I found the wall bucket at a second-hand store for $3.50 and purchased the flowers at Michael's Arts and Crafts store for 59% off the regular price. I have about $25 invested in this project. I didn't like the initial color of the wall bucket, I so sanded and painted it before adding the flowers. I was quite pleased with the final product.

    Approximate Time: about 1.5 hours

    Supplies:

    • metal wall bucket
    • latex primer
    • foam brush or paint brush
    • acrylic or spray paint
    • wire cutters
    • assorted silk flower bunches
    • floral Styrofoam
    • sandpaper
    • paper towel

    Instructions:

    1. Remove handle from wall bucket and use sandpaper to lightly sand the entire piece.Sanding original bucket finish.

    2. After sanding, wipe it down with a paper towel to remove any dust.Wipe off dust from sanding. Paint entire piece and handle with latex primer and allow to dry. Bucket after priming.

    3. When dry, paint with acrylic paint or spray paint and set aside to dry. (I used a hair dryer to speed up the drying time for the primer and the paint.)Painting the primed bucket yellow.

    4. Put handle back on bucket and insert a piece of floral foam inside the bucket, trimming it to fit. The bucket I purchased already had some foam inside that was still in good usable shape, so I didn't have to add foam.Floral foam at base of bucket.

    5. The three large flowers I used had extremely long stems, so I used wire cutters to cut the stems off to a manageable length.Cutting flower stems to length.

    6. Insert the largest flowers into the foam, as shown.Adding tall flowers first.

    7. Next, insert the middle sized flowers to fill in around the large flowers.Arrangement with the large and medium flowers.

    8. Then, add the smaller flowers to fill in the bare spots. Lastly, add small flowers and pieces of ivy. Now, your wall bucket is ready to hang.
    Closeup of final arrangement.Finished floral wall bucket on the wall.

    By Rachel's Mom from Wilkesboro, NC

    *******
    Links:
     
    Fabric-Wrapped Spring Containers

      Welcome Easter with pretty pails dressed up to fit spring plants or to serve as your Easter baskets. To determine how much fabric you'll need, wrap fabric around the container, allowing extra fabric on all edges; trim. Also cut openings for the handle. Fold under all edges to get a smooth look. Spread decoupage medium across the pail, place trimmed fabric atop the decoupage medium, and smooth. Apply a second coat of decoupage medium atop the fabric while working your way around the container.

    Fabric-Wrapped Eggs

      Turn faux eggs into centerpiece-worthy stars. Trim fabric into strips and glue to the egg shapes (as an alternative, attach the fabric to a double-sided adhesive sheet before applying).

    Flower Power Candy Cups

      Use brightly colored store-bought cups and scrapbook papers to create these cheerful candy cups that kids will love. Insert leaf-shape name tags to transform this cute Easter craft into easy place markers.

    Sticker Easter Eggs

      After the egg dipping and dying, the kids can go crazy with stickers. Small round colored stickers (available at office supply stores) make easy and mess-free embellishments. Display the finished Easter eggs in a basket for Easter decor.

    Jelly Bean Door Decor

      This cute door hanger is a fun Easter craft kids can make with a little supervision. Paint a paper-mache letter (available at crafts stores) using acrylic paint. Match the paint to the color of the jelly beans. Let the paint dry. Hot-glue the jelly beans to the front of the letter. Let dry. Hot-glue a ribbon to the back for a hanging loop.

    Hanging Egg Decoration

      A tumble of pastel eggs is an Easter craft for kids that makes a cheery welcome at the front door. Wrap plastic foam egg shapes (available at crafts supply stores) with strips of crepe paper, attaching ends with glue or a small straight pin. Embellish with ribbon secured using small straight pins, leaving a long end for tying. Gather eggs at varying heights and tie ribbons together. Hang from a removable adhesive hook or wreath hanger, and add a ribbon bow to complete the Easter decoration.

    Easter Treasure Box

      Remember those shoebox dioramas you made in grade school? We've given them a crafty Easter twist with purchased white shadow boxes decorated for spring. Cover the inside backs of the boxes with bright paper, then tuck in mementos from Easters past. Or, choose a less temporary springtime theme using an artificial bird's nests, eggs, and feathers.

    Nested Egg Placeholders

      Personalize and decorate plastic Easter eggs to use as quick and cute placeholders for your special guests.

    Easy Easter Tote

      Treat the Easter hostess to a little pampering. Fill an empty egg carton with fizzy bath balls for a thoughtful Easter gift. Cover the carton top with pretty paper and tie with ribbon.

    Easter Dioramas

      Inspired by delicate sugar eggs that house intricate candy scenes, these boxed Easter displays are easy to make with materials from crafts stores. Cover the insides of small cardboard boxes with colored paper. Line the bottoms of the boxes with moss. Create miniature scenes with tiny baskets and toy chicks or with springtime images cut from vintage-look Easter postcards.

      Give your display a three-dimensional effect by attaching cutout images to a small branch (center) or by scattering additional elements, such as a broken egg and individual paper blossoms, around the image (bottom).

    Egg Planter

      For a unique twist on the traditional Easter egg, give eggshells second life as planters. Fill the planters with different types of plants, such as these colorful alyssum seedlings. Involve the kids in planting and caring for the little Easter garden.

    Catch spring fever with these quick and easy Easte...

    http://www.bhg.com/holidays/easter/crafts/easy-to-make-easter-cards/
    Wish a special someone a happy Easter by handcraft...

    http://www.bhg.com/holidays/easter/eggs/easter-baskets-and-bags/
    Get the family together to craft these fun, simple...


    ********
     

    Hello ... Whew, what a weekend

    Hello ...
    Whew, what a weekend. I am not Mrs Plumber. A one way air valve broke, some time ago. Jerry picked a replacement up over the weekend. We had to go to Clarksville when we had planned on going to Erin and enjoying their Festival. Well, after driving Clarksville, Jerry thought we should put the van in and get the oil changed, a tire looked and the chassie lubed. So we parked the van at Flintstone, He goes in, sets it up, comes out and tells me it's going to take at least 45 minutes before they can take it in, and should only take 30 minutes. Ok... Next door is Golden Corral. (one of our favorite places to eat) So we walk over, eat a nice breakfast and walk back. The van hasn't been moved... We were gone almost an hour.. I had Jerry grab the Phase 10 cards out of the van and I go inside. He stays outside long enough to smoke one o his cigars. about 1 1/2 hours after he was told it would be 45 minutes, the van is in the bay, and up in the air. Oil done, all lubed up and tire fixed (we had a nail in it) Jerry was very frustrated that it took twice as long as he was first told. But all that work was needed and he didn't have to do it. We then headed to an R.V sales and parts place we knew of, looking for a part for the plumbing. They don't have it and "Good Luck" finding it.* note here... most plumbing in campers are not the same size as what is in a house, except Air Streams. I suggested that we go to Home Depot, With a stop by Walmart first, cause I had a list of things I have thought about picking up for over a week. (need to make a fresh list now) Found almost 1/2 of what was on my list.
    Then, Jerry dropped me off at Hobby Lobby while he goes to Home Depot. I bought some papers, inks, a new stamp and two wooded boxes. I could have shopped more but didn't want to spend all day long there. Funny.... I got out of the van but forgot my wallet.. I had to run from one door to the other and call Jerry, He had my wallet ready when I got to the window. I havn't run in years.
    He found a replacement part at Home Depot. But he forgot that I was also looking for plants. I didn't like any of the ones I saw at Wal-mart. By then it was just after Noon. We headed back to the camper. Walked the dogs, put the part on (It works) and we didn't even take anything out of the van. We headed to Erin. We got there after the parade (Yeah!!) A lot of people but not as much noise. Lots of bikers walking around. Saw a couple of nice bikes. Heard some local Music while we were walking around. I found a tent with T-shirts and went looking though our size. I can't tell you how hard it can be to find 2x and 3x printed shirts we like. I found 4 and the man said $80.. they are $20 each.. Okay... Hey Jerry did you see this one? It's the Grim Reeper pipping a tune on a bone. He liked it so that made 5 shirts, Jerry paid for them and I think we totally surprised the man by not putting back any of the ones I had picked out. I had picked out two for me that have horses on them. We need some t-shirts we can wear when we are out. At another booth, I found some wooden plates we can use and I found good silver plated drinking mug that Jerry can use next time we go to a CoHT meeting at a third booth.. I don't think we are going to make it this year. After that I was fairly wore out so we made it back to the van and we left. Back to the camper. Walk the dogs again. I take my Insluin and we decided we are eating out again. I did suggest we go to Dickson since it's the same amount of time to drive there as it takes to go to Clarksville. We ended up back in Clarksville and after driving around a while, ended up at Steak N Shake, and after eating, Jerry took me to Lowe's where I picked up some flowers to put in my planters this morning (got to hurry and finish this so I can go do that ) Sunday, We were at the Walmart in Waverly. Mostly to try to find a couple of fans for here in the camper, and to finish up my list, All done, back to the camper. Jerry put up a shelf I had suggested, is thinking of a shelf over his bed and a tv for over his bed.. but man oh man is my home a wreck. I spent two hours this morning just cleaning up the bathroom. The cats found a roll of paper towels and shredded it, I am cleaning up from the water over-flow and have to bleach out a few things. I did head back to bed for 3 hours and am now ready to get up and get more done. I'll be back in a bit to write more, I'm sure.
     

    Sunday, March 18, 2012

    I have my cord back


    I have finally gotten the cord back for my new Cricut cutter. I had only made a few cuts with it, trying it out befor I made the mistake of taking the cord with me to my caughters' home when I meant to take a power cord for a printer I gave her. She has finally gotten my cord back to me. But my camper (home) is such a mess that I need to cleam up long before I can play with it. My first project is going to be a birthday card for my Grand son. I found some great papers at Hobby Lobby over the weekend that I want to make his card with and will be working on that tomorrow

    Notice the button up top? it for a free give a way for a cart for the Cricut. I'm also putting a link to her blog in my list of blogs to check out.

    Thursday, March 15, 2012

    Teri's Crafts Newsletter for March 15, 2012


    Hello. I hope you are ready for Saturday's Pinching Party. Or at least that is what I grew up with. I would be sure to wear a nightgown that had green on it, cause my younger brother would try to sneak into my bedroom and pinch me first thing, if I didn't. Mom was usually good at catching him at it, but there were a couple of times, he got past her.
    I have many memories of being pinched over the years on St. Patrick;s day.  My Dogs are finally learning that they are not to bark when I talk to someone. I still can't get close enough for a conversation, but I can say "Hi" without them trying to mug who ever it is I just said Hi to. They are always pushing each other around trying to get all the loving they  can from strangers. The cats love to sit in the door, looking out. I'm not sure if it's the birds they are looking for, or Smokey.
     
    Rocky and Smokey (the last picture we took of Smokey)


    St. Patrick's Day printables include lucky leprechaun coloring pages and printable activity sheets for kids. Then, follow the rainbow over to our dinner recipes and our dessert recipes.


    Circular Knitting Needle Labels - DIY

    Since I've been trying to improve my knitting skills, I picked up a stack of circular needles from the thrift store.

    They're in great shape - except none of them had any sort of size markings on them. Are all circular needles like this? The previous owner had attached stickies to a couple of them marking the size but the rest were a mystery.

    First I had to figure out what size the needles were. I did it by comparing them with my marked straight needles, although they do make a needle gauge for this. Then I wanted to mark them so I would easily know what size each needle was. Here's what I came up with:

    Number beads, attached to a safety pin, then clipped to the circular part of the needle.


    To Make:

    Place the appropriate numbered bead onto the head pin, clip to size, loop, and attach to the circular opening at the bottom of the safety pin.
    Here's a good picture tutorial on how to use a head pin.

    That's really all there is to it. And now my needles are nice and labeled


    Spring Wreath Round-up

    This is the wreath that's on my door for spring right now (although, technically, it's probably not yet spring here in Colorado). It's a wreath I made several years ago - strips of felted wool wrapped around a wreath form and hot glued in place, then I added a few crocheted flowers.


    And this was my spring wreath from last year. I may trade out for this one later in the spring. You can see more info on how I made this one here.


    And here are a few beautiful spring wreaths that I've seen, mostly via pinterest:

    cute and simple, via


    Spring Grass Wreath, tutorial


    a non-wreath wreath, via


    via


    coffee filter wreath, tutorial


    Nailpolish Jewelry Make-Over

    Nail polish can be a great tool for making-over, updating, or re-vamping jewelry. I used it for this bracelet . . .

    . . . back for 30 Days for 30 Dollars, tutorial here.


    Yesterday, I found this little necklace at the thrift store for $1 -

    Cute image, but I thought it would be better with a little color. Nail polish to the rescue!

    My new and improved necklace -

    I just painted it with nail polish. Then dabbed on some antiquing glaze - the same stuff I used for this project - to take some of the shine off.


    Here's a hint - nail art polish works well for very small bits of color because it comes with these very thin brushes (sorry, not the best photo). I got mine at the dollar store.

    Here's another necklace that I made a long time ago, back before I started this blog:

    gold brooches, painted with nail polish, then attached together with jump rings
     

    Quick Quiet Flip Books

    Here's something quick and easy to add to your quiet bags.


    This first one is from the Friend Magazine. You can click here to print your own out. There are nine pictures showing the life of Jesus. I glued them to card stock, laminated them, punched holes in them and put them on rings.


    The next one comes from the Ensign Magazine. Click here to print your own. It is the story of the Book of Mormon. It has short summaries of the major stories in the Book of Mormon. I printed it out on cardstock, lamintated, punched them.


    The kids loved to look through them last Sunday during church


    St. Patrick's Day Pins

    I decided to make St. Patrick's Day pins for my kids to wear. My sister made some for her kids a few years ago and I thought it was a great idea. Unlike a t-shirt, they will be able to wear them year after year. Here's how mine turned out.


    Here's the supplies I started with:

    Felt
    Beads
    Needle and Thread
    Pins
    Shamrock Pattern

    I started by cutting out some Shamrocks on my Silhouette.

    Then I traced them onto the felt and cut them out.


    Then I sewed them together using a back-stitch and adding beads for embellishment.


    Then I added the pin to the back.


    I decided that my son probably wouldn't want beads on his so I just stitched it. I almost like it better.


    What do you do for St. Patrick's Day? Do you make your kids a special something to wear?


    Bead Board St. Patricks Day Decor

    Are you getting sick of my bead board projects yet? I hope not because I'll probably keep making them until I have something for each holiday.
    Here's my St. Patrick's Day Bead board Decoration.


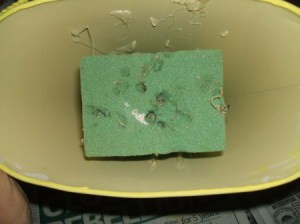
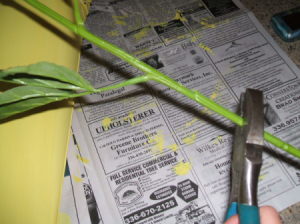
    For the shamrock I used my silhouette. I just searched the online store and found a set of 3 shamrocks I liked. I cut it out on paper and then traced it to the bead board. Then I used a jig saw to cut them out. For the letters I used the font Elephants in Cherry Trees. I don't really recommend cutting such small letters with bead board.

    Check out my K - the top painted coating came off while cutting it out. Also my C doesn't like to stay up. I sanded it down to be a little flatter, but it still sometimes falls.


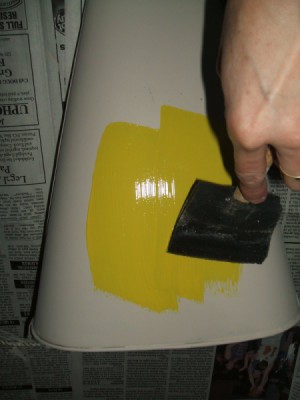
    For the colors I used Folk Art Wicker White for the letters, and Folk Art Thicket, mixed with a little white to lighten it, for the shamrock.
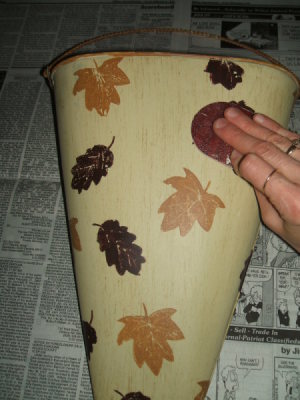
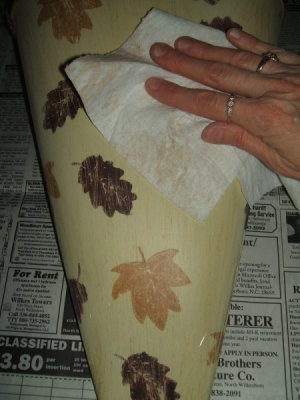
    I used Americana Staining Antiquing Medium and Thicket green for the glazing. For more tips on glazing and how to make my little stand see my Bead Board Pumpkins post.

    I originally wanted to do two shades of green - but since I didn't want to go to the store with 4 kids in tow, I used what I had. I think I like the white and green.
    What do you think? Do you like it?


    PAPER EASTER BUNNY CARD

    Designer : Nicole™ Crafts Team!

    YOU KNOW SOME BUNNY LOVES YOU WHEN YOU RECEIVE THIS CARD!

    TEAR OUT SOME PAPER TO MAKE SOME FUN EASTER CARD CREATIONS!
    Level - Intermediate
    Step by Step
    1 CUT PATTERNS FROM WHITE CARDSTOCK. USE STYLUS TO TRACE PATTERNS ONTO CARDSTOCK, LEAVING FAINT LINE ON CARDSTOCK. FOR EACH TRACED PIECE, HOLD TRACED AREA OF CARDSTOCK IN ONE HAND AND SLOWLY TEAR PAPER WITH OTHER TOWARDS YOUR BODY. REPEAT PROCESS FOR ALL.
    2 REFER TO PHOTO TO ASSEMBLE AND GLUE THE BUNNY. ONCE ASSEMBLED, USE POUNCER TO BRUSH THE TORN EDGES OF THE BUNNY WITH PINK CHALK. GLUE EYES AND POMPOM TO BUNNY.
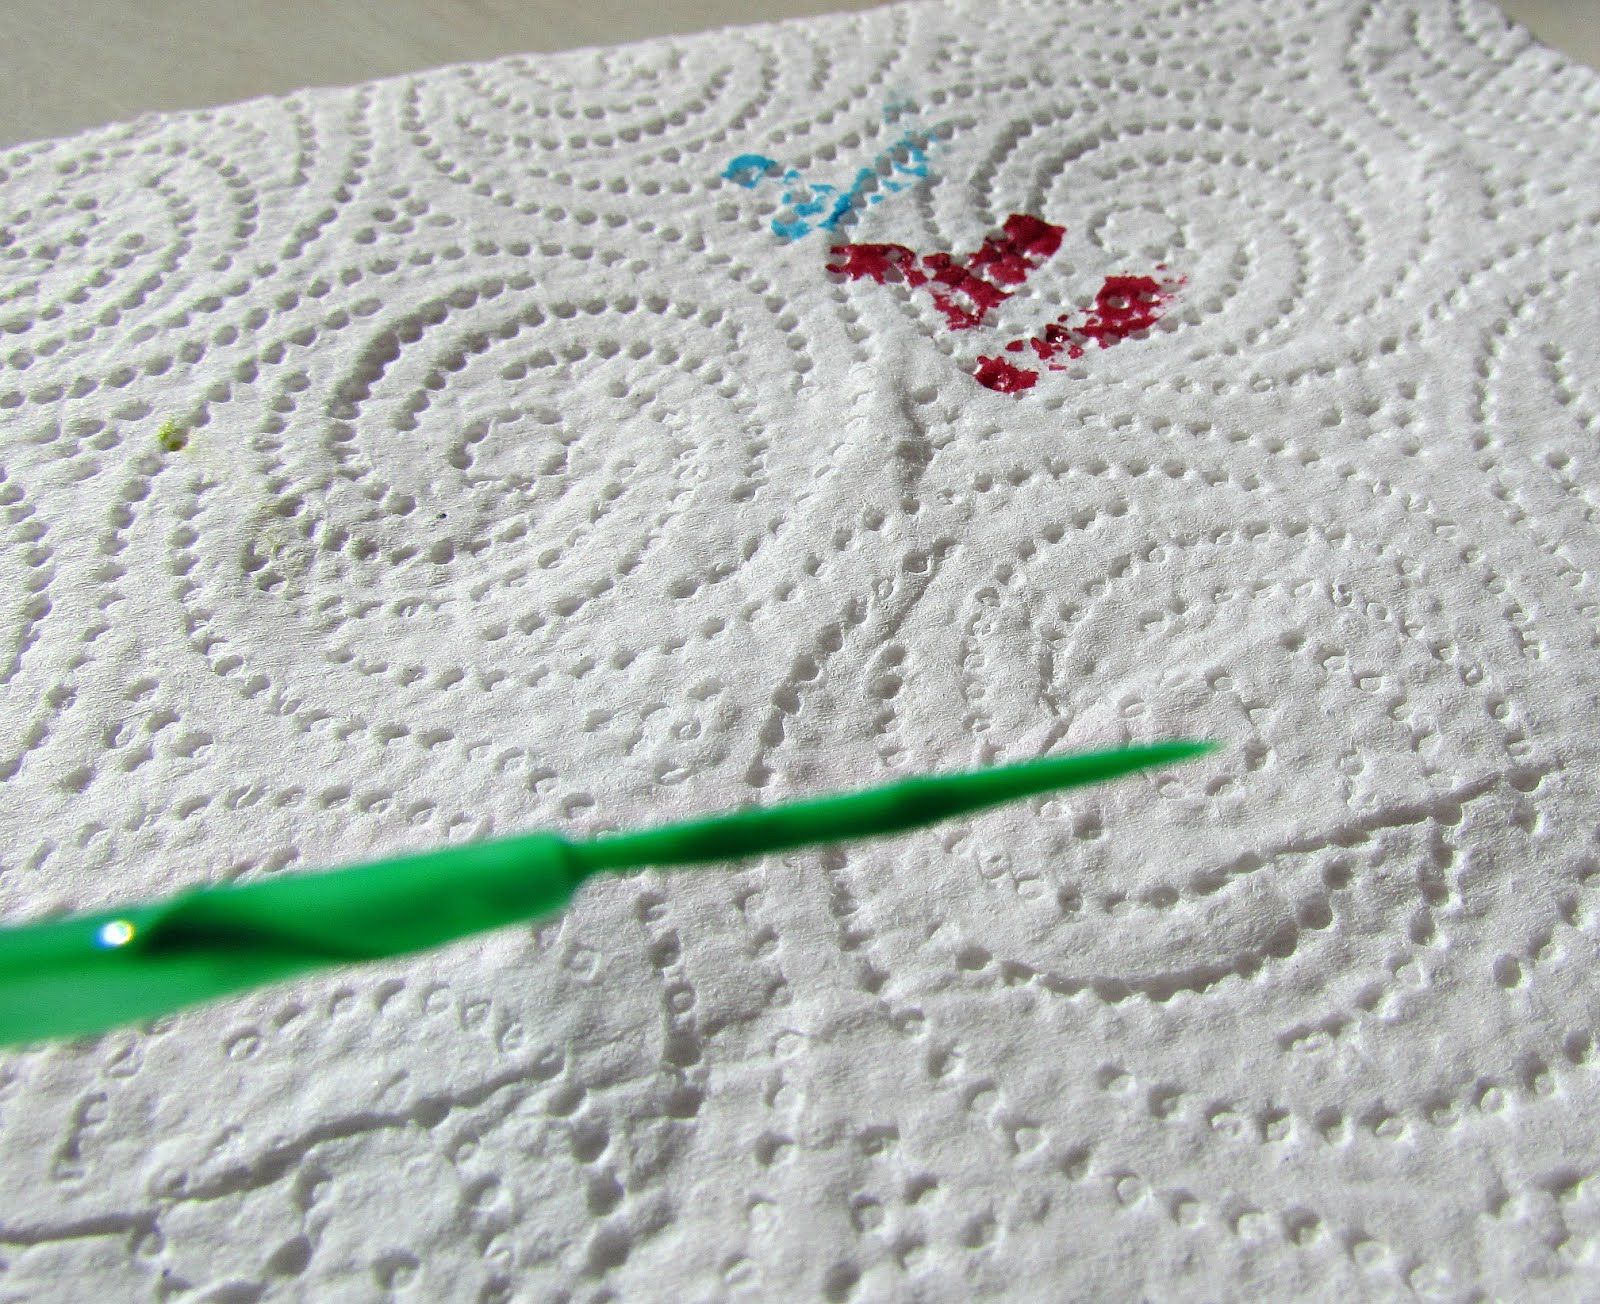
    3 BRUSH THE TORN EDGES OF EACH FLOWER PETAL WITH ACRYLIC PAINT. SEE PHOTO. GLUE PETALS TOGETHER TO MAKE THE THREE INDIVIDUAL FLOWERS. PAINT THREE MINI CRAFT STICKS GREEN. ONCE DRY, GLUE ONE MINI CRAFTSTICK ONTO EACH FLOWER.
    4 EMBELLISH FLOWERS WITH RHINESTONES AND RIBBONS.
    5 GLUE THE RABBIT TO THE CARD AND GLUE THE FLOWERS INTO THE RABBIT'S HAND.
    6 CUT A 6 7/8" X 2" STRIP OF PURPLE PAPER AND GLUE TO THE BACK, OPEN EDGE OF THE CARD. SEE PHOTO FOR DETAILS.
    PAPER EASTER BUNNY CARD
    Supplies
    1 MEM 1802 PASTEL BLENDING CHALKS
    1 PPR 3003 8 1/2 X 11 PASTEL CARDSTOCK 50CT
    1 STR 105-16 FLOURESCENT GREETING CARDS
    1 WOD 3232 2 5/8" NATURAL CRAFT MINI STICK

    Additional Items

    Nicole™ tacky glue
    #10 flat brush
    white cardstock
    7mm pastel rhinestones
    1/2" lavender ribbon
    6mm wiggle eyes
    1/4" pink pom pom
    acrylic apint (lavender, yellow, olive green & fuchsia)
    pouncer
    stylus


    Links: