Hello. Sorry this one is so late. Hubby was rained out yesterday, and I spent the day with him. Then, Hubby was half way to work this morning, when he got really sick and turned around and came back home. So most of today was spent with him. First was an hours drive to see a doctor about why he's not feeling well. Raging Sinus Infection. She said she's seen at least 650 in the last 8 weeks. He sounds just like what I was dealing with, last week. When we got back home, one of our cats had died. We had to find a place to bury him. We found a nice place in the woods for him. He was the first of the four kitten that Hubby found, was always the first to get into anything. Our Explorer and Adventurer. I'll miss him. His siblings already miss him and keep looking for him as do the dogs as well.

{DIY} Decorative Jewelry Organization
Labels: Decor, DIY Projects, Home Sweet Home, Tutorials
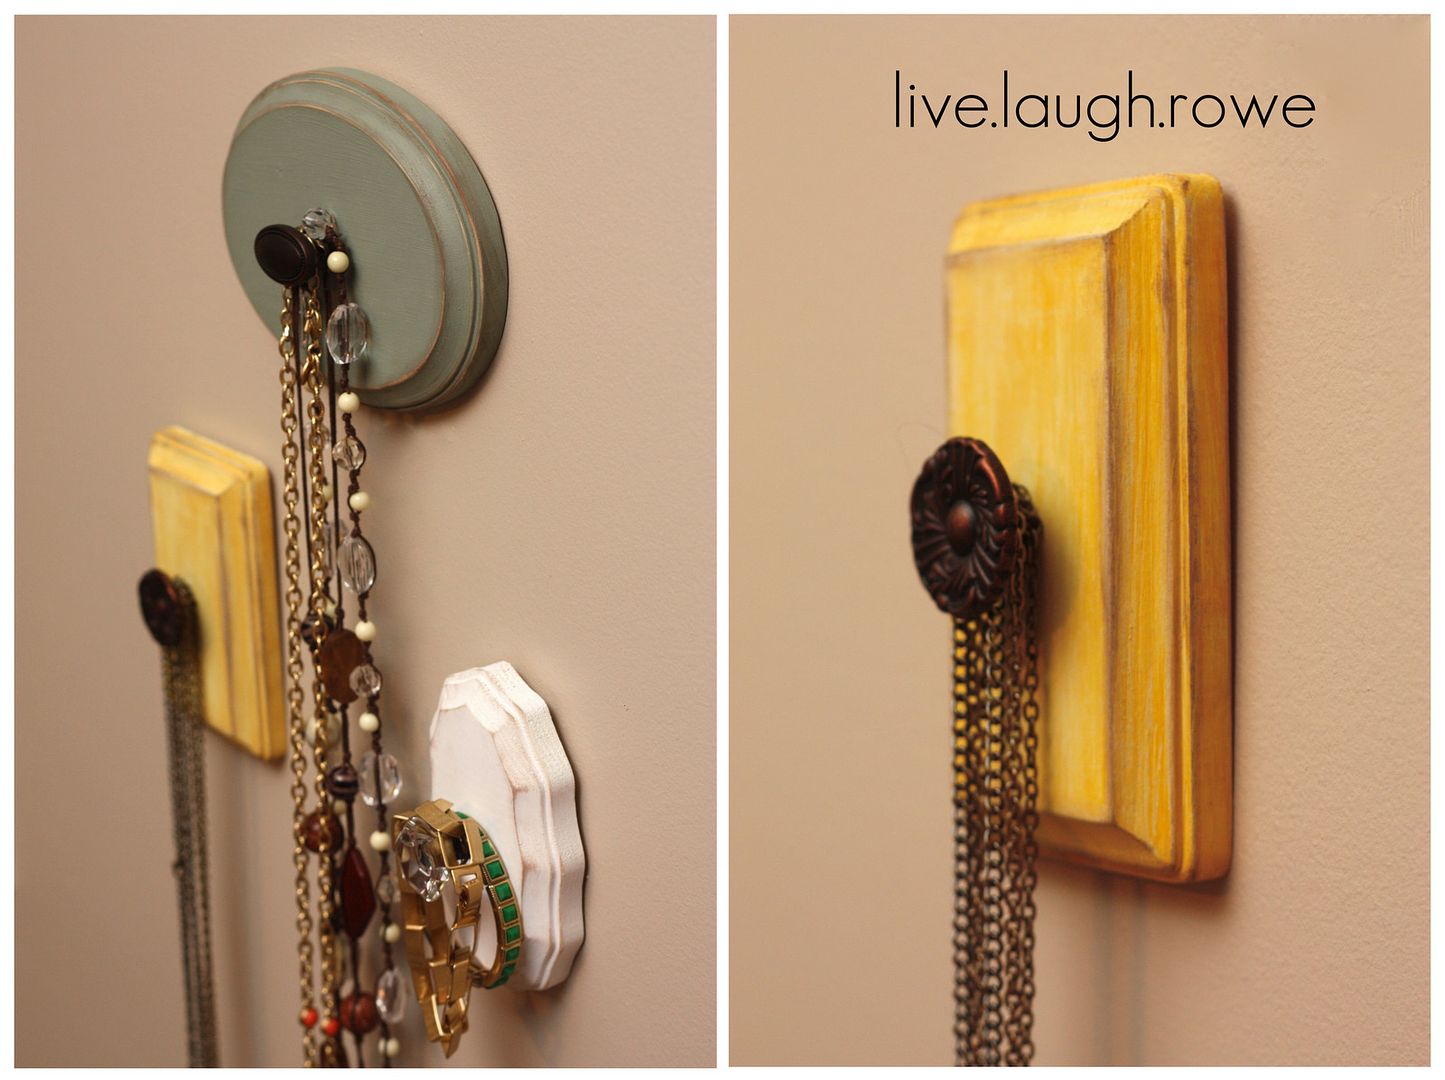
Last year I happened to come across this darling idea by Space 46. I keep a host of links on my computer of projects that I think might come in handy around the house. Well, this weekend -- this project came in super handy. I {love} my accessories, but they need a little help in staying organized.
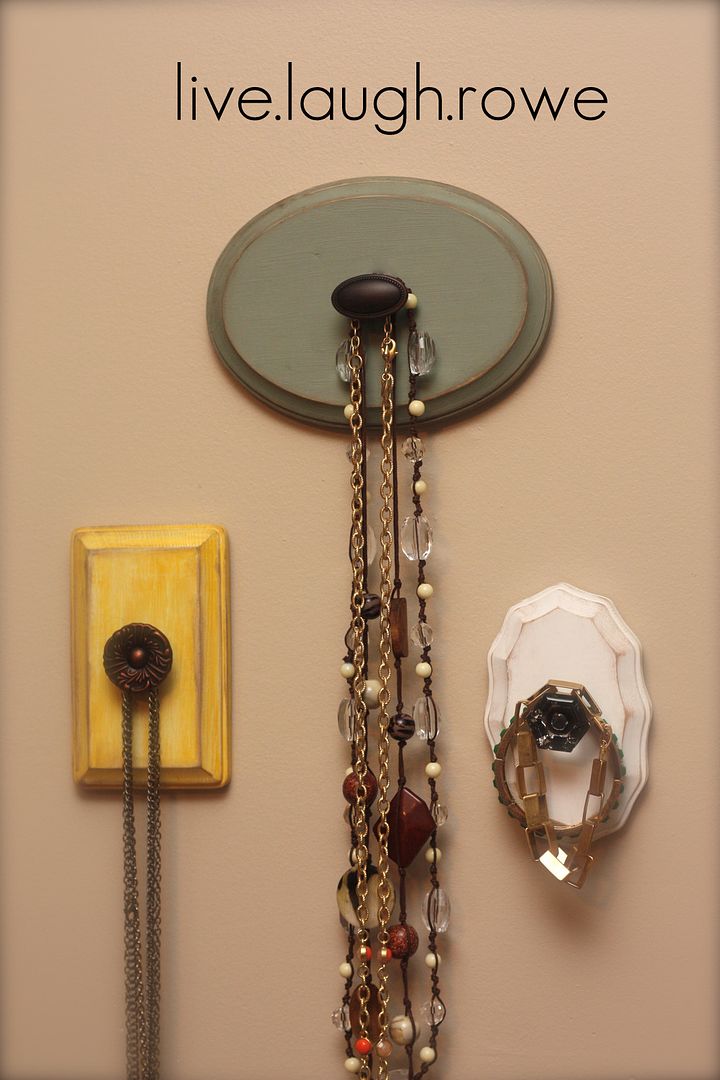
Here's a peek into a corner of our closet, where some of my necklaces are nesting. Then I have some hanging on 's' hooks in front this accordion rack. And, of course, there are some hanging on the closet door knobs. Phew. They're everywhere!
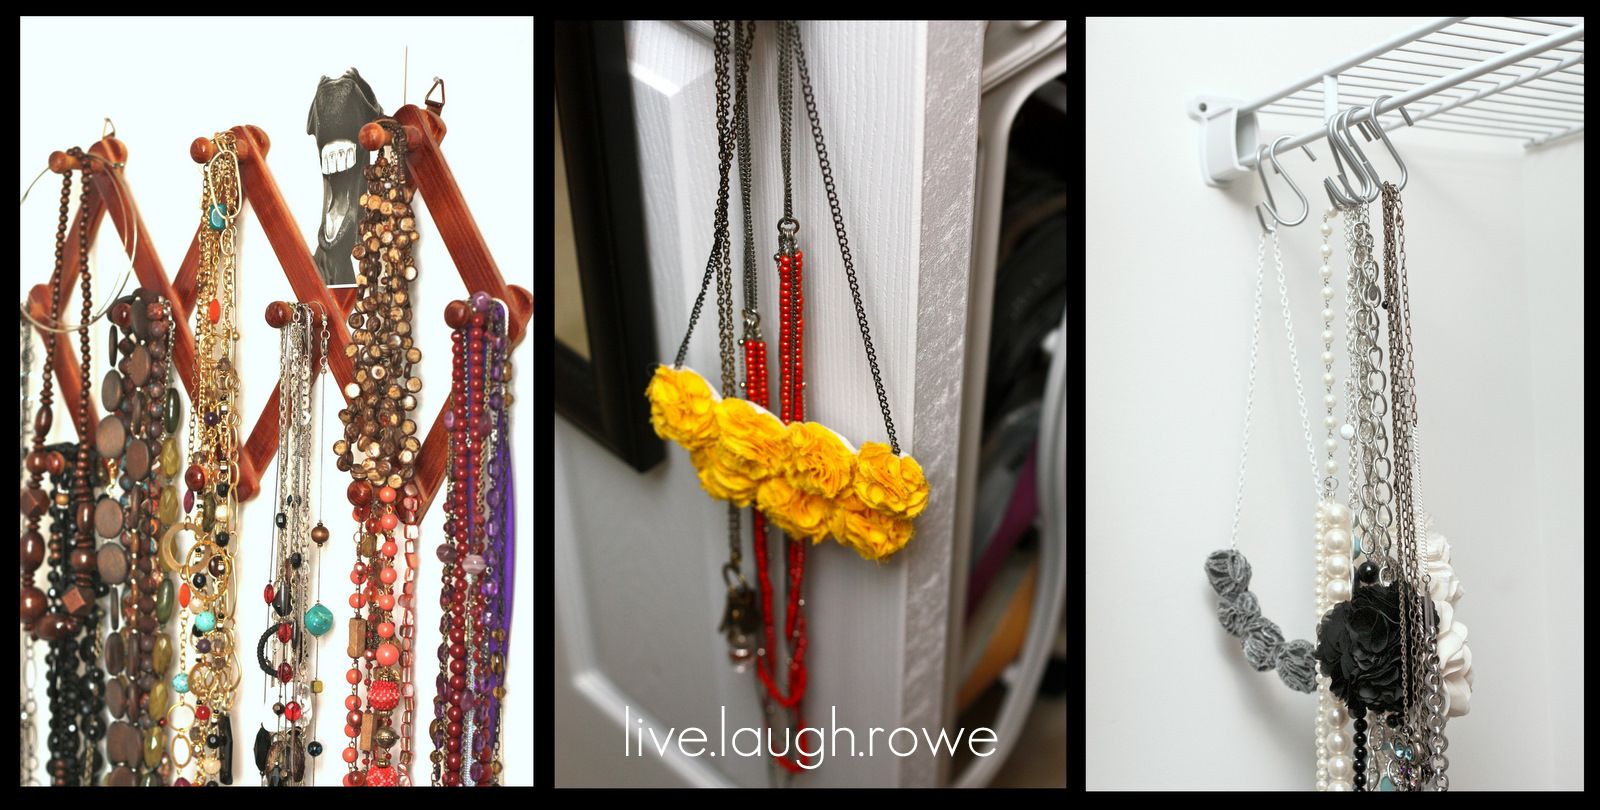
So, as you can see -- they're everywhere and I definitely needed to consider a cute way to store and even display some these pieces in all of their cuteness. Inspired by My at Space 46, I put my own twist on this {DIY} project and I couldn't be happier with how they turned out.
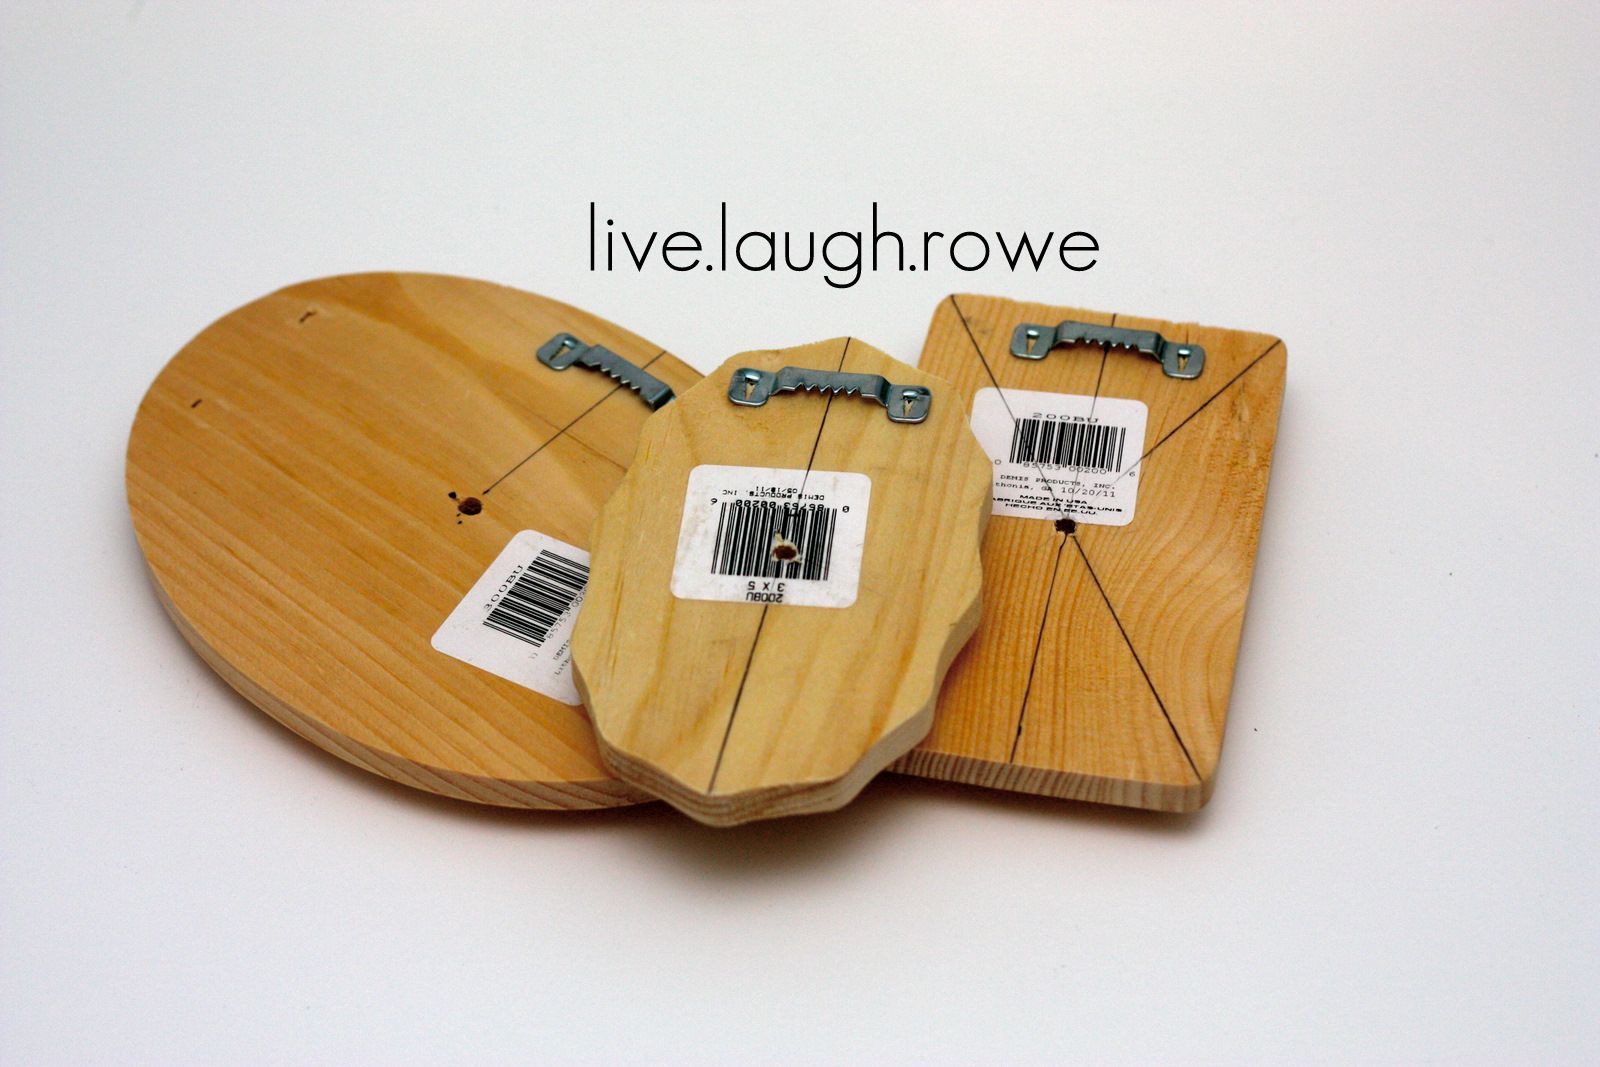
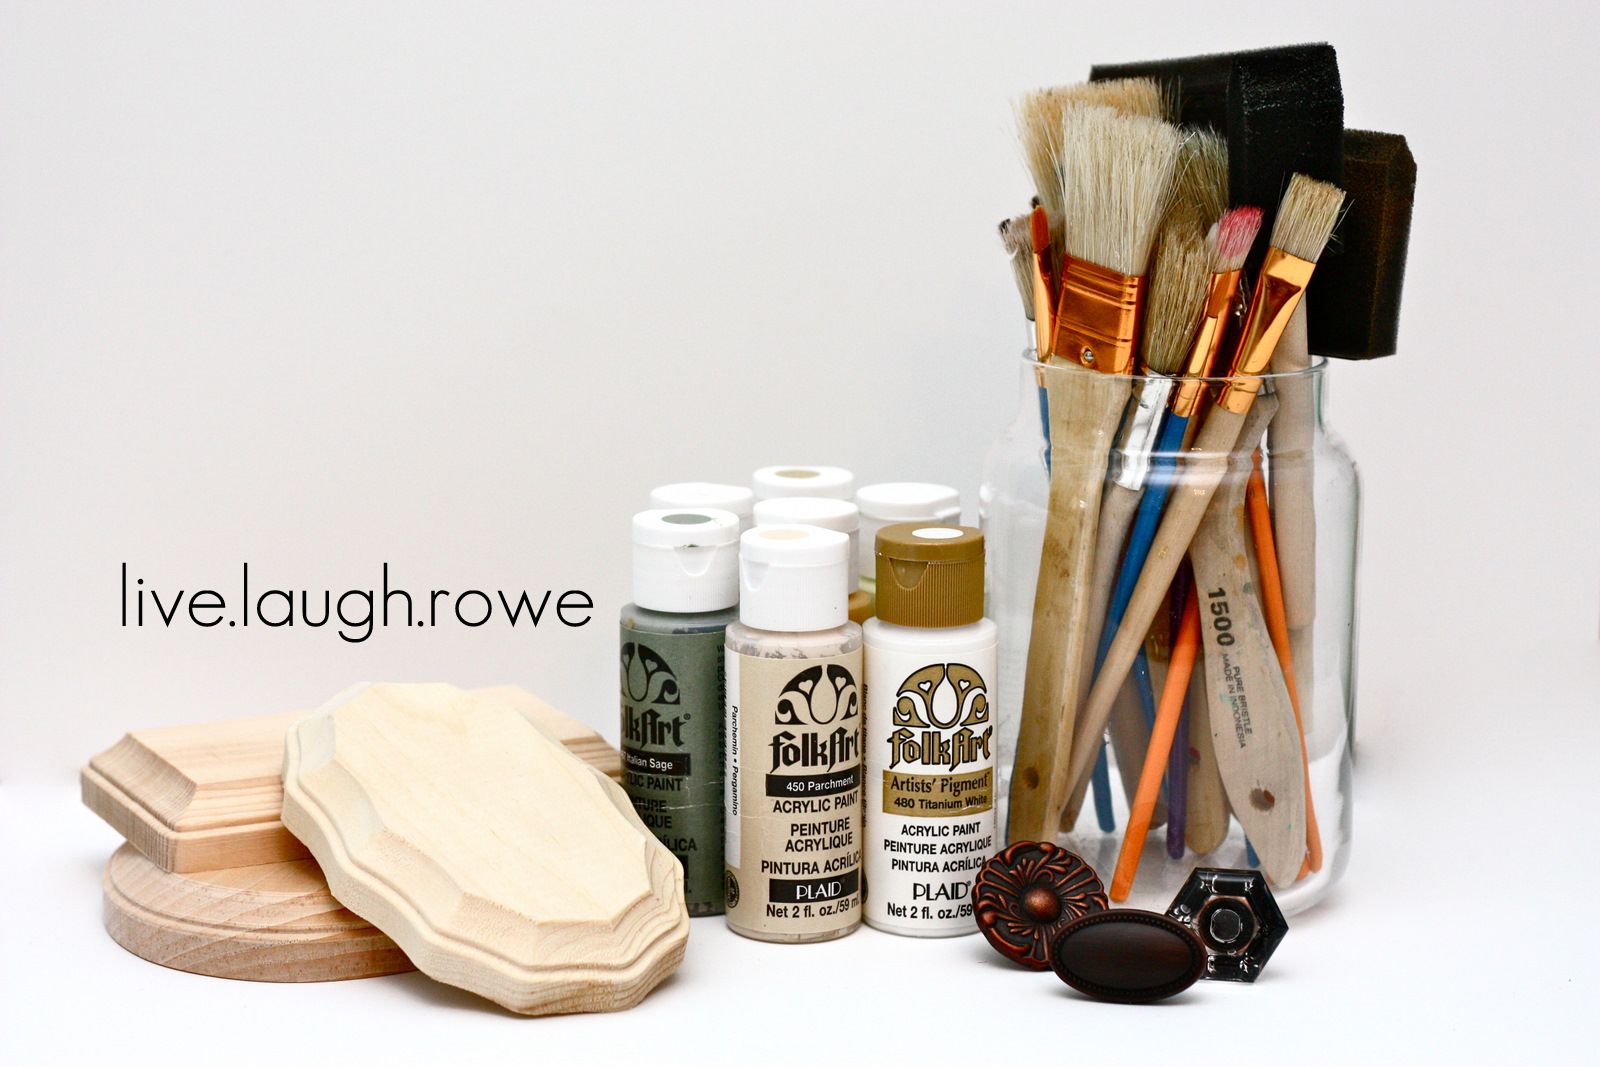 A couple of items not pictured that you might want to have on hand as well would be thee sawtooth hangers to attach to the back of the plaque for hanging and your handy dandy drill. Other than that, you should be set to go. All of the acrylic paint I already had in my crafty stash. The wood plaques were about $1.00 each at Micheal's and the cabinet knobs varied in price. I bought these at Lowe's for about $8.00. So, it's a fairly inexpensive project.

Here's a peek into a corner of our closet, where some of my necklaces are nesting. Then I have some hanging on 's' hooks in front this accordion rack. And, of course, there are some hanging on the closet door knobs. Phew. They're everywhere!

So, as you can see -- they're everywhere and I definitely needed to consider a cute way to store and even display some these pieces in all of their cuteness. Inspired by My at Space 46, I put my own twist on this {DIY} project and I couldn't be happier with how they turned out.

Let's round up our supplies:
Wood Plaques, Acrylic Paint, Paint Brushes/Sponges and Knobs

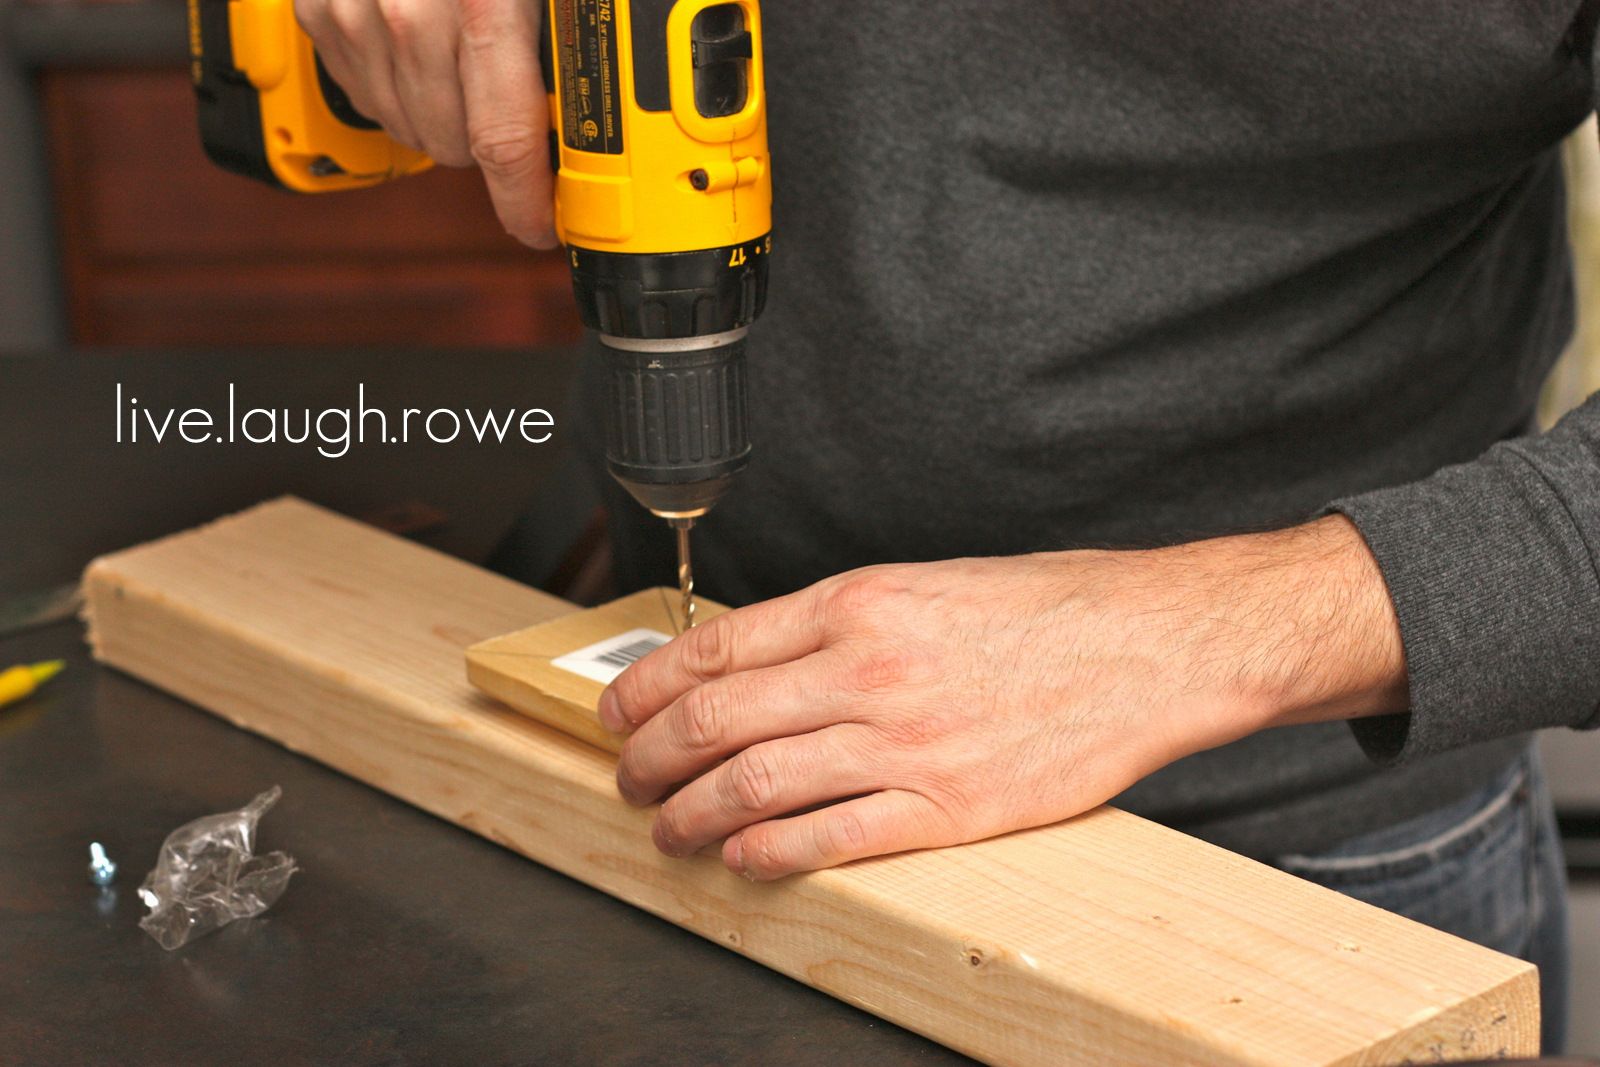
Alrighty, let's start with drilling our holes and attaching our sawtooth hangers.
As you can see here, I recruited the help of my wonderful hubby {smile}.
As you can see here, I recruited the help of my wonderful hubby {smile}.


Now we're ready to paint...
I didn't take pictures of this, as I'm pretty sure we all know how that goes {giggle}.
After a couple of coats of paint, a little sanding and staining -- you'll attach your knobs and voilá!


One of the hottest new trends in crafting is palette art! Just search "wooden palette" on Pinterest - you will get a variety of ideas! Since, I started paying attention to it in detail, I see left over palettes everywhere! There were two next to a restaurant we ate at the other night and I have seen several in our neighborhood (lots of new construction).
While making my weekly pilgrimmage to Hobby Lobby, I came across this cute little palette-esque serving tray! I bought it without any idea how I was going to use it. (I tend to shop impulsively...lol)

Here's what I made with it!

Here's what you need:
Palette (of your choosing)
Cameo
Silhouette Vinyl
Paint and sponge brush
Glue gun
Silk flowers
1. Once again, I began by printing up a vinyl stencil on my Cameo. Adhering it to the wood was quite difficult. It didn't want to stick! But I made it work.


3. Let the paint dry before removing the stencil.
4. Then I hot glued some silk flowers in the corners and TA-DA!

While making my weekly pilgrimmage to Hobby Lobby, I came across this cute little palette-esque serving tray! I bought it without any idea how I was going to use it. (I tend to shop impulsively...lol)

Here's what I made with it!

Here's what you need:
Palette (of your choosing)
Cameo
Silhouette Vinyl
Paint and sponge brush
Glue gun
Silk flowers
1. Once again, I began by printing up a vinyl stencil on my Cameo. Adhering it to the wood was quite difficult. It didn't want to stick! But I made it work.

{This a good picture of what NOT to do. I ended up moving the stencil slightly to the right after this picture was taken. Make sure yours doesn't have bubbles like this one!}
2. Then using the sponge brush, I carefully painted the letters. I ended up doing two coats so it "popped" but not a third because I wanted to be able to see some of the wood.


3. Let the paint dry before removing the stencil.
4. Then I hot glued some silk flowers in the corners and TA-DA!

I can't believe how this turned out! I love it!!
Creatively yours,
Jill

While preparing my mantle for spring, I decided it needed something a little extra. And since I'm slightly addicted to the Silhouette vinyl and Armour Etch, I decided to whip up something to fill in the holes!

Here's what you need:
Votives and candles (99 cents each at Michaels)
Cameo
Vinyl
Armour Etch
1. Pick out your design in the Silhouette store. Then create the stencil with the Silhouette vinyl.
Carefully apply to votive, taking extra care to get out all the bubbles and wrinkles otherwise the Armour Etch will bleed.

2. Glop on the Armour Etch and let sit for 5 to 10 minutes.

3. Rinse off the Armour Etch with warm water and remove stencil.

So easy! I decided to make a set of three! All of them are slightly different. I think they turned out darling!
{The pictures would have turned out better if I had a different color votive, but I couldn't find a purple that I liked!}
{The pictures would have turned out better if I had a different color votive, but I couldn't find a purple that I liked!}

What are your go to items when you need a little extra??
Creatively yours,
- Jill -

LOOKY, LOOKY at what I made!! It is super CUTE!!! I made i to give away but I am really quite thrilled with how it turned out and not sure that "special" person will receive their gift!! ;)


DUHHHH....I forgot to give you the tutorial!! I took a frame from Dollar Tree and hot glued eggs randomly around the edge and then went bavk and filled in the spots!! Hot glue a ribbon and and
THERE YOU GO!!!
Less than $10!!


I have gotten tons of questions about the centerpieces that I made for Riley's Minnie Mouse Birthday so I thought I'd share the play by play on how to make these simple, yet adorable centerpieces. We had four, but you can obviously make as many as you need. I'm going to give the supplies and directions for how to make one though.
You will need:
- A bucket of some kind for the base (Mine is from Hobby Lobby)
- Bamboo skewers if you want them tall (You could always use lolipop sticks, but I wanted them tall)
- 2 medium size green styrofoam balls
- 2 small size green styrofoam balls
- Black spray paint
- Printable with name and age of the birthday made using MS Powerpoint
- Ribbon for the bow on Minnie's head and for the bow on the bucket
- Hot glue
You will need to spray the styrofoam balls first. I chose the green styrofoam balls because it made the paint appear to shimmer. Once the paint is dry, hot glue the small balls to the large one to make ears. To finish off Minnie's head you need to make the bow. I used the same ribbon I used for the Minnie Mouse Ears that we made for all Riley's guests. You'll need to pinch the ribbon in the middle once you've overlapped it to give it a dimpled effect. Next, you'll tie a ribbon around the middle and hot glue the bow to Minnie's head. You'll need to make another bow if you want to embellish the bucket and hot glue that on too. Place the second large styrofoam ball into the bucket so you can attach the printables and Minnie's head into the bucket. I made the printable double sided with Riley's name and with the number 2. I used tulle from her Highchair Tutu to give the printables a little more girlish flair. I then pierced Minnie's head and the printables with the bamboo skewers and placed them into the styrofoam ball that's in the bucket.

DIY Designer Fabric Band-Aids

With a toddler in the house, we always have an available stash of band-aids. Various sizes, colors and prints (Princesses & Hello Kitty are a must)! Lately my lil gal has been obsessed with them. OBSESSED! Which sort of goes hand-in-hand with her sticker fascination.
Since the fun printed band-aids aren't cheap, I decided to kick up the basic version with some fun & vibrant fabrics!

What you'll need:
Fabric
Adhesive band-aids (I used the fabric version)
Double sided tape
Scissors

Unwrap the band-aid & place two strips of double sided adhesive tape on the top (fabric side)

Lay out the fabric, reverse side facing you & press the band-aid on to it. Cut around the edges.

That's it! Momma-made band-aids!
Easy peasy & super cute!

Since the adhesive tape probably won't let the band-aid breathe, these might be best for small owies or faux scraps & bumps!


links:


Billie C.
No comments:
Post a Comment