
Give a used glass bottle a second life as a pretty Easter vase. Cover the bottle with thick strips of colored tape (available at crafts

Button, button, who's got the button? Your little girl will be a style star this Easter when you make these hairclips with pretty buttons. Open the clips before attaching fabric or stacked buttons with hot glue; allow to dry overnight.

Transform a metal container into an Easter basket or a spot to store your Easter candies. Look for brightly colored metal tins and add magnets (you also can create your own magnets by attaching magnetic strips to printed letters or designs). Top with pretty paper flowers and file-drawer labels.

Rascally Rabbit Gift Box

delight your child and
help spread Easter cheer.
- Oval box with lid (7-1/2 x 10 x 5 inches)
- 12 x 18-inch sheet of pink stiff felt
- Stapler
- Crafts glue
- Double-sided tape (optional)
- 5 sheets of blue paper
- White, black, purple, and yellow paper scraps
- Thin white wire
- 1-1/2-inch pink pom-pom
- 2-1/2-inch white pom-pom
- White crafts fur scraps
- Hole punch
- Orange curly ribbon
1. Cut two 4 x 18-inch ears from felt. Staple ears inside the box along top edge.
2. Cover box and lid with blue paper.
3. Have an adult cut a 1/8 x 4-1/2-inch slit on each side of the lid and slip over ears.
4. Cut out face pieces and glue to front of box. Add wire whiskers, a pink pom-pom nose, and white pom-pom tail. Glue a small piece of fur to top of lid.
5. Punch two holes at the top of each ear. Thread one curly ribbon through each ear. Knot ends together to create a handle.
Charming Chicks Sock Puppets

1. Cut the cuffs off the socks, cut wings from the cuffs, and sew two wings onto the sides of each puppet. The birds have black-bead eyes, orange felt beaks, and feather-boa tufts of hair.
2. For legs, poke orange pipe cleaners through the socks and bend to hold in place.
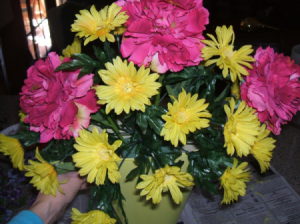
Spring Floral Wall Bucket
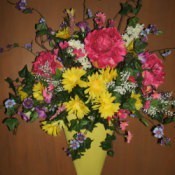 Welcome spring with a floral wall bucket for your wall or door. Flowers can be easily arranged if you begin with the largest flowers and end with the smaller ones. I found the wall bucket at a second-hand store for $3.50 and purchased the flowers at Michael's Arts and Crafts store for 59% off the regular price. I have about $25 invested in this project. I didn't like the initial color of the wall bucket, I so sanded and painted it before adding the flowers. I was quite pleased with the final product.
 Approximate Time: about 1.5 hours
Supplies:
- metal wall bucket
- latex primer
- foam brush or paint brush
- acrylic or spray paint
- wire cutters
- assorted silk flower bunches
- floral Styrofoam
- sandpaper
- paper towel
Instructions:
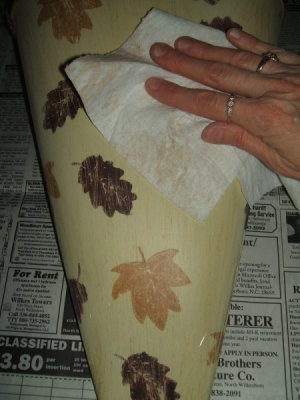
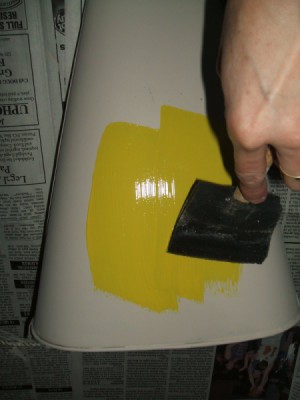
- Remove handle from wall bucket and use sandpaper to lightly sand the entire piece.
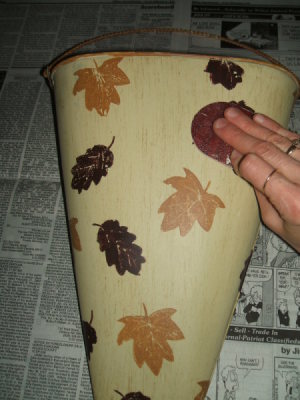
- After sanding, wipe it down with a paper towel to remove any dust.
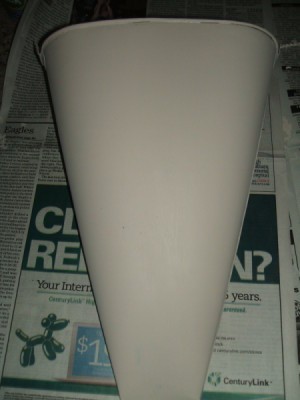
- When dry, paint with acrylic paint or spray paint and set aside to dry. (I used a hair dryer to speed up the drying time for the primer and the paint.)
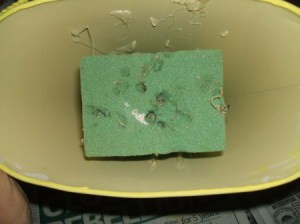
- Put handle back on bucket and insert a piece of floral foam inside the bucket, trimming it to fit. The bucket I purchased already had some foam inside that was still in good usable shape, so I didn't have to add foam.
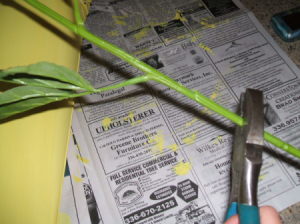
- The three large flowers I used had extremely long stems, so I used wire cutters to cut the stems off to a manageable length.
- Insert the largest flowers into the foam, as shown.
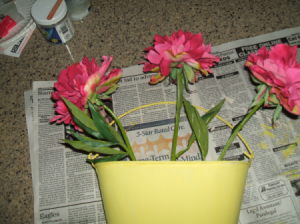
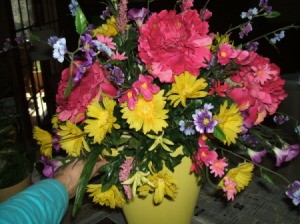
- Next, insert the middle sized flowers to fill in around the large flowers.
- Then, add the smaller flowers to fill in the bare spots. Lastly, add small flowers and pieces of ivy. Now, your wall bucket is ready to hang.
- When dry, paint with acrylic paint or spray paint and set aside to dry. (I used a hair dryer to speed up the drying time for the primer and the paint.)
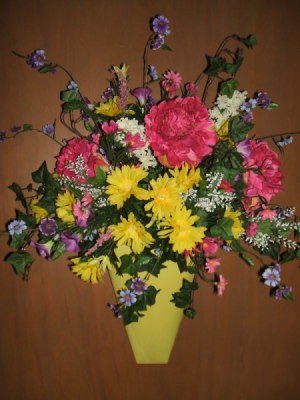
By Rachel's Mom from Wilkesboro, NC
Welcome Easter with pretty pails dressed up to fit spring plants or to serve as your Easter baskets. To determine how much fabric you'll need, wrap fabric around the container, allowing extra fabric on all edges; trim. Also cut openings for the handle. Fold under all edges to get a smooth look. Spread decoupage medium across the pail, place trimmed fabric atop the decoupage medium, and smooth. Apply a second coat of decoupage medium atop the fabric while working your way around the container.
After the egg dipping and dying, the kids can go crazy with stickers. Small round colored stickers (available at office supply stores) make easy and mess-free embellishments. Display the finished Easter eggs in a basket for Easter decor.
This cute door hanger is a fun Easter craft kids can make with a little supervision. Paint a paper-mache letter (available at crafts stores) using acrylic paint. Match the paint to the color of the jelly beans. Let the paint dry. Hot-glue the jelly beans to the front of the letter. Let dry. Hot-glue a ribbon to the back for a hanging loop.
A tumble of pastel eggs is an Easter craft for kids that makes a cheery welcome at the front door. Wrap plastic foam egg shapes (available at crafts supply stores) with strips of crepe paper, attaching ends with glue or a small straight pin. Embellish with ribbon secured using small straight pins, leaving a long end for tying. Gather eggs at varying heights and tie ribbons together. Hang from a removable adhesive hook or wreath hanger, and add a ribbon bow to complete the Easter decoration.
Remember those shoebox dioramas you made in grade school? We've given them a crafty Easter twist with purchased white shadow boxes decorated for spring. Cover the inside backs of the boxes with bright paper, then tuck in mementos from Easters past. Or, choose a less temporary springtime theme using an artificial bird's nests, eggs, and feathers.
Personalize and decorate plastic Easter eggs to use as quick and cute placeholders for your special guests.
Inspired by delicate sugar eggs that house intricate candy scenes, these boxed Easter displays are easy to make with materials from crafts stores. Cover the insides of small cardboard boxes with colored paper. Line the bottoms of the boxes with moss. Create miniature scenes with tiny baskets and toy chicks or with springtime images cut from vintage-look Easter postcards.
Give your display a three-dimensional effect by attaching cutout images to a small branch (center) or by scattering additional elements, such as a broken egg and individual paper blossoms, around the image (bottom).


No comments:
Post a Comment