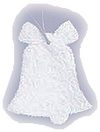
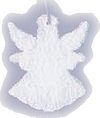
Winter White Glitter Ornaments Sometimes simple ideas are best, and that's the case with these homemade glitter ornaments. Use cookie cutters - or our free printable Christmas shapes template - to make paper cutouts, then cover in winter white glitter to make pretty hanging ornaments for the Christmas tree.
Please note: younger children can use safety scissors to cut out their ornaments, but a craft knife is very sharp and should only be used for this project by responsible adults.
 Trace templates on heavy paper and cut out with scissors or craft knife (use self healing cutting mat if you use a craft knife). Punch a hole at the top centre of your cut out using a hole punch or other sharp object that will poke a hole for hanging. I used a wood pointed toothpick to punch the holes. A standard hole punch is too large for this project.
Apply glue to one side of the paper cut out and cover glued area with glitter. Allow this to set for just a minute and then you'll be able to handle it, but be careful not to damage what you have just glittered. If your a little skeptical, wait until this layer is dry before you continue.
Apply glue to the other side of the ornament and apply glitter to this side as well. Place your ornament on a smooth flat surface (I used a cookie sheet) to dry completely. Do not disturb your ornaments until they are dry. If you do, you risk causing them to warp slightly.
Once your ornament is dry, clear any glitter that has filled the hole by pushing a toothpick through the hole. Tie a piece of decorative cord or ribbon through the hole to use as a hanger.
 Sometimes simple ideas are best, and that's the case with these homemade glitter ornaments. Use cookie cutters - or our free printable Christmas shapes template - to make paper cutouts, then cover in winter white glitter to make pretty hanging ornaments for the Christmas tree.
Please note: younger children can use safety scissors to cut out their ornaments, but a craft knife is very sharp and should only be used for this project by responsible adults.
Craft Supplies:
White heavy weight paper (40lb minimum)
- free printable Christmas shapes template
- Clear drying craft glue
- White glitter
- Scissors or craft knife
- Specialty hole punch or other tool to punch hole
- Ribbon or decorative cord
 Trace templates on heavy paper and cut out with scissors or craft knife (use self healing cutting mat if you use a craft knife). Punch a hole at the top centre of your cut out using a hole punch or other sharp object that will poke a hole for hanging. I used a wood pointed toothpick to punch the holes. A standard hole punch is too large for this project.
Apply glue to one side of the paper cut out and cover glued area with glitter. Allow this to set for just a minute and then you'll be able to handle it, but be careful not to damage what you have just glittered. If your a little skeptical, wait until this layer is dry before you continue.

Apply glue to the other side of the ornament and apply glitter to this side as well. Place your ornament on a smooth flat surface (I used a cookie sheet) to dry completely. Do not disturb your ornaments until they are dry. If you do, you risk causing them to warp slightly.
Once your ornament is dry, clear any glitter that has filled the hole by pushing a toothpick through the hole. Tie a piece of decorative cord or ribbon through the hole to use as a hanger.
Billie C
<http://groups.yahoo.com/group/BilliesChristmasCorner/
I love homemade Xmas decorations. I have a four year old, so I'm JUST getting to that stage in things! Totally fun!
ReplyDelete